Saturday, August 4, 2012

Turn an Outfit Into a Room: Sleek, Edgy, and Glam

Last night's Project Runway was a bit underwhelming. The designers were faced with their first team challenge and it seems that everyone toned down their point of view so much that no point was made. There were however a few stand out outfits that could be turned into fabulous rooms, but what kind of challenge would that be for Ellenor? So here we go, from the lowest scoring designs on the runway here is what Christopher Palu and Andrea Katz put together.

With last season's winner, Anya Ayoung-Chee, as their client these designers should have been able to create a look that was fresh, relaxed, and sexy. Unfortunately this dress missed the mark in both identifying with their client and with execution. However pull the same basic ideas from the design of the dress, such as sleek and edgy with a touch of glam and you can put together a pretty good room. 

Streamlined furniture and monochromatic materials create the same basic aesthetic of the dress's design.  Details such as the blown glass lamp and gold accents give just the small bits of glamor to the room to keep it from being too boring. Variations in the same main color also help keep away the blah factor. Leather and industrial elements such as the design of the bar cart and details found in the drum side table, give the edge to the room that the studded leather belt had tried to give in the dress. A palest pink on the walls in a very high sheen would be the perfect way to finish this room.


Saturday, July 28, 2012

Turn an Outfit Into a Room: Crazy Girly

On last night's Project Runway, season 10, the designers faced their "Unconventional Challenge" where they had to create a fashionable look using... candy! The variety of candy from Dylan's Candy Bar provided the designers with good n' plenty to work with in way of color and textures and many of the designers were able to use their creative abilities to create "Candy Couture,"as the great Michael Kors stated. However some of the designs were a bit sour.


Buffi Jashanmal is a sweetheart, but her design last night was a bit skittles.... oops, I mead scattered. I love her vibrant personality and ideas, but it seems like she just couldn't channel them into one coherent look. But with a little bit of editing, this outfit could be a great room. 

Take these girly hues and feminine flair and you've got yourself a crazy girly room that's full of fun. Like with last week's design, the key to making this outfit into a successful room is using your pops of color wisely. A neutral background on your walls and floor will allow you to be more bold with your color choices. 

To keep the feminine touch about the room, select furniture pieces that have soft curves. Curves are easily read as feminine, as is a skirt on a sofa... especially when in pink! A lightweight curtain will also help soften the harsher colors of the room. And to keep it from getting out of control, keep the majority of the pieces in solid colors, but you should have one piece that pulls them all together. Here, the curtain is that piece in the room, but the rug also helps without adding any additional pattern. 

While this room is not a relaxing room, it is definitely a room to lift your spirits... or give you a sugar rush. 


Until next time,
Ellenor

Saturday, July 21, 2012

Turn an Outfit Into a Room: Modern Funk

Another season of Project Runway is upon us, and you know what that means don't you? Another season of Turn an Outfit Into a Room! That's right design lovers check in with Ellenor weekly to see a fashion design transform into an interior design.


However this season will be a real challenge in that the transformation will come from one of the not so successful designs from the runway. We'll see how something that doesn't work as an outfit can be re-imagined to work as room. So let's get started of the premier of...


Turn that (bad) Outfit into a (great) Room!


On last night's premier of Project Runway, season 10, Kooan Kosuke made us all laugh with his quirky and bright personality. But when it came to his runway design his bright personality and bold designs fell short.

But take those same pops of color and funky patterns, shake them up, and lay them out in new way and you can come up with a room that is super cool and modern. The key is using the colors and patterns in a bunch of small doses with an underlying simple background. In this room the walls should be a simple white, and the floors would look best as a light stained wood. This creates a perfect backdrop to allow for bold colors and patterns.


Streamlined furniture and modern materials, such as metals and acrylic, help to punch this room up and achieve some of the futuristic accents that Kooan had in his design. While you may never see yourself walking down the street in this outfit, hopefully you would love hanging out in this modern, funky room.... Ellenor would!


Til next week,
Ellenor

Sunday, March 18, 2012

How To Customize and Add Length to Ready-made Curtains

Ready-made curtain panels can easily be purchased at most stores. They are an inexpensive way to help complete a room’s look. However, many ready-made curtains come in standard lengths, which don’t always work in your home. Adding a fabric to any curtain panel will not only add length to the panel, but will also add your own personal touch to them. Select a contrasting or coordinating fabric, solid or patterned, to go with the curtain panels you already have and help achieve the look you want and create your own custom curtains!

Materials Needed: Store bought curtain panels, fabric of your choice, fusible fabric iron on, scissors, yardstick, iron, and curtain hardware
1. Before you get started, measure where your current curtain panels hang and then measure how much additional fabric you will need to add in order for them to just skim the floor. Typically, curtains should be mounted about halfway between the top of the window frame and the ceiling. However, with higher ceilings measure the distance above the window frame to the ceiling and then mount the curtains about 1/3 of that distance.
2. Shop for your fabric! The fabric can be added to either the top or the bottom of your existing panels. The directions given are for adding fabric to the bottom of the panels. As a rule of thumb, the darker fabric should be at the bottom to keep the curtains visually balanced.
3. Lay out your ready-made panels flat and then lay your selected fabric over these panels so that you can copy the width. Add a couple of inches at each edge so that you can fold over for a nice seam. Measure and cut the desired length as well, also leaving a few inches to fold over.
4. Place a strip of the fusible iron about an inch from the edge of the selected fabric, fold over about a half-inch of fabric, and iron the fabric together to create a hem. Do this all the way down each side of the fabric length-wise only.
5. Once the length of both sides of the fabric has been hemmed, position the panel onto the ready-made panel with about an inch of overlap. Once positioned, place your strip of iron-on between the fabrics and iron for about 10 seconds on each strip until you’ve adhered all of the fabric to the panel.
6. Once the fabric has been ironed onto the panel you should have a couple inches of fabric left over on each side. Cut off additional fabric on the ends so that about one inch remains
7. Again, lay down a strip of iron on fusible tape about an inch from the edge of the fabric, fold the edge over, and then iron to fuse fabric together. Do this on both ends and this will finalize all hemming.
8. Attach your new longer curtain panels to the curtain hardware and enjoy your custom curtains!

Sunday, March 11, 2012

How To Arrange a Bookcase

Bookcases can be a blessing and a curse to the overall design of a room. A blessing because, when done properly, will add beauty and comfort to a room. A curse because, what is the “proper way?” Here are a few tips and tricks to arranging a beautiful bookcase and containing the clutter:

1. Take account of what you have. If you don’t have a lot of books, plan on putting the books you have on the bottom shelves and leave the upper shelves for accessories. Bookcases should visually be heavier on the bottom and lighter on the top.

2. Think about how you’ll use the bookcase. Arranging the books by genre, subject, or author may be the most useful. However, if the bookcase will be more of a visual piece, then arranging the books by color looks great. You can also do a combination of these techniques. Whatever is most useful to you and looks good!

3. Start placing your books. Put your best looking books at eye level and try to hide the most ragged ones. Remove the dust covers (unless they are collectable) to display the books in all thier gorgeous glory. Sometimes books have beautiful leather and gold embossing which really add beauty and warmth to the bookcase.

4. Paperbacks need a place too. Mix these in with hardbacks and don’t group too many of these together because they tend to all be a similar small size which does not fill up a shelf very well. Be mindful of book sizes when placing books on the shelves together and try not to put really tall books next to short ones.

5. Mix up the orientation of the books. Place some upright and lay others on their side. These stacks of books can serve as ‘bookends’ to the rows.

6. Don’t over crowd the shelves, leave a little bit of breathing room on each shelf. And never pile excess books, magazines, or papers on top of a row of books.

7. Accessorize with some non-book items: picture frames and other knick-knacks work great as bookends, sitting on top of a stacked pile of books, and breaking up a long row of books. You can also hang a framed artwork over some of the shelves if you have enough space (or too much!)

8. Put telephone books, loose papers or magazines out of site. Use nice looking magazine files or storage boxes to hide these items.

Wednesday, February 1, 2012

How to Throw a Last Minute and Fabulous Super Bowl Party!


So you just decided to have some friends over for the big game… or your house was voted as the place to be for the most important day of football. Either way, you've got to put together a fabulous football party in a short amount of time. Here are some quick tips to be on the winning team this year!
Ready, set, go!


Get your roster and game time set! Study your playing field!
Invite a fun and diverse group of friends and tell them all to arrive an hour before kick off time. But before that, make sure you have enough seats and space for everyone on your list. Since this party revolves around watching TV, you don't want anyone to be left without a seat. Then think about your layout... where will the food and drinks go? Make sure that they won't interfere with the view to the TV!

Get your game plan ready!
Decide if you will be providing all of the food or if this will be a team effort (aka, pot luck).
If it’s a pot luck you should plan on the main dishes so that you are sure to be covered. Then send a quick request to your guests and ask them to tell you what they'll be bringing. Fill in any gaps as you hear back.
If you'll be providing all the food, keep in mind that most people will still show up with something in hand. So have some extra bowls or platters ready. For some great recipes, check these out!


Support your fans!
By having a few other things going on during the game you are sure to involve all of your guests. But to keep the party from becoming too segregated into footballers and non, make sure the activities are still about the game… here are a few ideas:
* Add in some extra excitement to the game by having some fun bets ready. Depending on your crowd, make them as silly or serious as you want! Keep it light though, no big money bets allowed!
* Make some quick and easy team flags or pom-poms for your guests to cheer on their team. They’ll get in the spirit faster than you can say “go team!”
* Have a football bingo game ready for those that aren't super excited about the Super Bowl. Keeping an eye out for a crazy face painter, a green wig, or something else eccentric will keep them interested and involved in the party.
* Remember the days of elementary school? A paper football game is fun too! Or if you have the space, go outside and play a quick game!

Just remember not to force your guests into participating in these activities or let them interfere with the game watching... some people really just want to watch the game (really!).

Be a good sport!
Most importantly relax and have fun, if you are then your guests will be too!

Hopefully these tips will help you and your guests have a SUPER time!

Cheers!
Ellenor

Saturday, January 14, 2012

Get Organized!

I recently had the pleasure of organizing the home office of a good friend. Now, when I say "pleasure" you much understand something about me... I am an organizational super fan! I was taught by the best, the organizational goddess herself... my mother. She molded me from a young age, even buying me an instructional "How to" children's book on organizing. At first I resisted... I fought it most of my life actually. It wasn't until I moved away that I realized (like most things she had taught me) that she was right.

I have come to learn that the skill of organization is a learned behavior. If not taught and practiced, it will not come. Enter my good friend...

My friend has many wonderful and outstanding qualities, organization is just not one of them. She works from home and was recently promoted, giving her many additional responsibilities and a large amount of paperwork to keep track of. With this promotion, she quickly realized that her "system" (or lack there of) would not support her increased workload. Knowing of my supreme skills (ahem, ahem) and of my crazy enjoyment of organizing, she came to me for help.

When I asked her about her current "system," I was horrified to learn about the large basket where she aimlessly threw everything. I nearly cried. I agreed to get to work immediately.

Below, you can read through how I was able to take her home office from scary to organized, and how you can do the same.

What you'll need:
A day of your time
Ample space on the floor
Lots and lots of Post-its
Pen for Labeling (I'm obsessed with Sharpies, especially the colored ones)
Paper Clips
Binder Clips (or as my friend adorably called them, "munchies")
Stapler

1. Grab your scary stack of unorganized papers and sit on the floor with plenty of space around you.
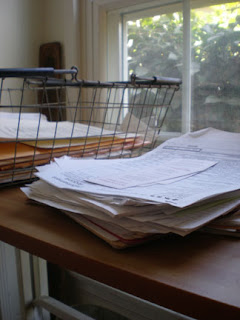
2. Begin by going through the scary pile each item at a time. Sort everything into different groups by making piles on the floor. To start off, be as specific as you can with these groupings... its better to have more piles than less. Once you see what you have, and how much space each group takes up, then you can decide what groupings can be combined, or further separated.
3. Stick a post-it on the top of each group/pile as you go labeling what it is.
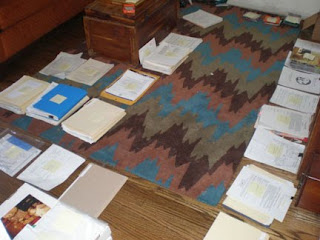
4. Now that you are surrounded by much less frightening piles, go to your bills, invoices, etc... and put them in chronological order. Think about how you will file and how you will want to access these papers in the future... do you want the most recent date in the front or back? Choose, and then be consistent!!! Do this with all chronological groupings.
5. Take note of the papers as you go through them. Are there duplicates that you don't need? Toss them! Is the receipt separated from the invoice? Staple them together! Condense and organize!
6. Now that you have a good sense of how large or small each pile is you can begin to combine or separate as necessary. Be careful not to make any one pile too general. Otherwise this will become a catchall of random papers. For example, my husband (before he met me of course) had files of "important Papers" (which had everything from his birth certificate to an oil change printout) and "Old Receipts" (which ranged from 2001 to now... Every. Single. Receipt.)
7. Make new post-it labels for those final piles.
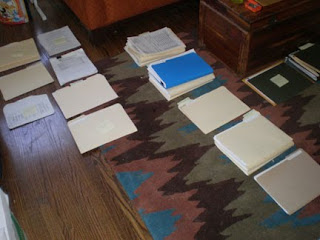
8. Survey what you have and make a shopping list of what you need to put all these piles away. Think of how you will use your new and fabulous organizational system. For storage, do you prefer 3-ring binders? File cabinet with hanging files? Letter boxes or trays? Magazine holders? Consider these storage options in conjunction with how often you will need to access the contents and their importance. Look at the amount of groups/piles you have and the space that you have to work with. Its ok to combine different storage systems. For this project, we decided to use a binder for important documents, a few boxes for media and pamphlets, a file cabinet for most, and a open file box for those most accessed papers/files. We went a step further by color coding some folders for the different phases of a project. For example, pending, researched, expired, rejected, and accepted.
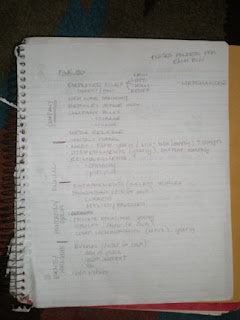
9. Shop! Purchase supplies that you need to immediately organize and put away the piles on your floor as well as back up supplies for when you need to expand. I've found that if you don't have these supplies handy, chances are that you'll start scary piles again and your organizational system will fall apart!
10. Splurge! Indulge yourself with some pretty files and organizational tools for the things that will sit on your desk or that you will use most often. If you are excited about it, then you are more likely to use it!
11. Back at home, start putting away your piles. Everything is already separated so this should be pretty easy. As you are putting things away, think again about how you will use it... do you want your credit card statements very accessible, or can they go near the back?
12. Use your post-its to label the new hanging files, boxes, etc, instead of writing directly on the labels provided. Once everything is put away, this will make it easier for last minute changes.
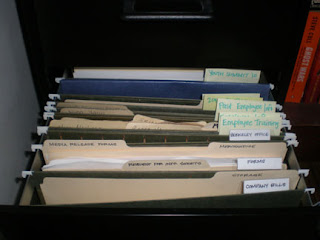
13. Now that everything is put away and you can see your floor again, survey the space that you have created. Does it suit you? Can you keep up with it? If no, move things around and make some changes!
14. Satisfied? Good! Now, remove your post-its and start writing or printing out your labels. Have fun with these, no need to be formal with your labels! Use color, stylized writing, or phrases that you like... for example, for our color coded files mentioned above, instead of using "rejected" we wrote "not now!" to put a positive spin on it (and to remind her to check in with them later). I have a letter tray at home labeled "crap to do" where I put bills to be paid that month, forms that need to be filled out, or anything else that needs my attention when I sit down to my desk. Have fun, but be clear enough to know what you're talking about later!
15. Last but not least, my most important tip! Allow yourself a "To be filed" basket or tray that is easily accessible. This allows you to be "bad" every now and then for those times when you are in a rush of just don't feel like it. BUT leave yourself (or make yourself) go through this at least once a week to separate and file away whats in it. Otherwise, you'll have to start all over again!

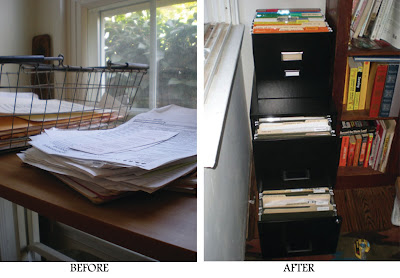
Whew! The hardest part is getting started and going through that scary pile. Once you do this, I hope that you'll find it's easier to keep up with than you think. Hopefully, like myself and my friend, you'll also find that its a bit addictive! Now that she has an organized home office (with pretty files!) she went on by herself to organize her husband's desk and their shared files! I'm so proud :)

Happy organizing!
Ellenor