I have come to learn that the skill of organization is a learned behavior. If not taught and practiced, it will not come. Enter my good friend...
My friend has many wonderful and outstanding qualities, organization is just not one of them. She works from home and was recently promoted, giving her many additional responsibilities and a large amount of paperwork to keep track of. With this promotion, she quickly realized that her "system" (or lack there of) would not support her increased workload. Knowing of my supreme skills (ahem, ahem) and of my crazy enjoyment of organizing, she came to me for help.
When I asked her about her current "system," I was horrified to learn about the large basket where she aimlessly threw everything. I nearly cried. I agreed to get to work immediately.
Below, you can read through how I was able to take her home office from scary to organized, and how you can do the same.
What you'll need:
A day of your time
Ample space on the floor
Lots and lots of Post-its
Pen for Labeling (I'm obsessed with Sharpies, especially the colored ones)
Paper Clips
Binder Clips (or as my friend adorably called them, "munchies")
Stapler
1. Grab your scary stack of unorganized papers and sit on the floor with plenty of space around you.
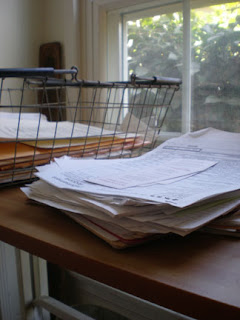
2. Begin by going through the scary pile each item at a time. Sort everything into different groups by making piles on the floor. To start off, be as specific as you can with these groupings... its better to have more piles than less. Once you see what you have, and how much space each group takes up, then you can decide what groupings can be combined, or further separated.
3. Stick a post-it on the top of each group/pile as you go labeling what it is.
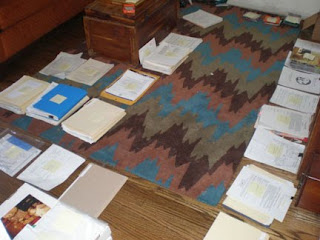
4. Now that you are surrounded by much less frightening piles, go to your bills, invoices, etc... and put them in chronological order. Think about how you will file and how you will want to access these papers in the future... do you want the most recent date in the front or back? Choose, and then be consistent!!! Do this with all chronological groupings.
5. Take note of the papers as you go through them. Are there duplicates that you don't need? Toss them! Is the receipt separated from the invoice? Staple them together! Condense and organize!
6. Now that you have a good sense of how large or small each pile is you can begin to combine or separate as necessary. Be careful not to make any one pile too general. Otherwise this will become a catchall of random papers. For example, my husband (before he met me of course) had files of "important Papers" (which had everything from his birth certificate to an oil change printout) and "Old Receipts" (which ranged from 2001 to now... Every. Single. Receipt.)
7. Make new post-it labels for those final piles.
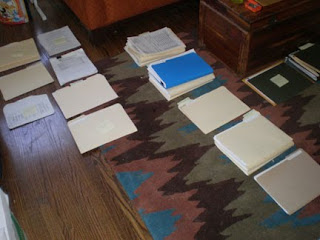
8. Survey what you have and make a shopping list of what you need to put all these piles away. Think of how you will use your new and fabulous organizational system. For storage, do you prefer 3-ring binders? File cabinet with hanging files? Letter boxes or trays? Magazine holders? Consider these storage options in conjunction with how often you will need to access the contents and their importance. Look at the amount of groups/piles you have and the space that you have to work with. Its ok to combine different storage systems. For this project, we decided to use a binder for important documents, a few boxes for media and pamphlets, a file cabinet for most, and a open file box for those most accessed papers/files. We went a step further by color coding some folders for the different phases of a project. For example, pending, researched, expired, rejected, and accepted.

9. Shop! Purchase supplies that you need to immediately organize and put away the piles on your floor as well as back up supplies for when you need to expand. I've found that if you don't have these supplies handy, chances are that you'll start scary piles again and your organizational system will fall apart!
10. Splurge! Indulge yourself with some pretty files and organizational tools for the things that will sit on your desk or that you will use most often. If you are excited about it, then you are more likely to use it!
11. Back at home, start putting away your piles. Everything is already separated so this should be pretty easy. As you are putting things away, think again about how you will use it... do you want your credit card statements very accessible, or can they go near the back?
12. Use your post-its to label the new hanging files, boxes, etc, instead of writing directly on the labels provided. Once everything is put away, this will make it easier for last minute changes.
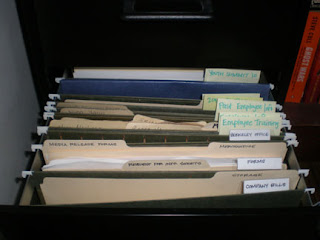
13. Now that everything is put away and you can see your floor again, survey the space that you have created. Does it suit you? Can you keep up with it? If no, move things around and make some changes!
14. Satisfied? Good! Now, remove your post-its and start writing or printing out your labels. Have fun with these, no need to be formal with your labels! Use color, stylized writing, or phrases that you like... for example, for our color coded files mentioned above, instead of using "rejected" we wrote "not now!" to put a positive spin on it (and to remind her to check in with them later). I have a letter tray at home labeled "crap to do" where I put bills to be paid that month, forms that need to be filled out, or anything else that needs my attention when I sit down to my desk. Have fun, but be clear enough to know what you're talking about later!

15. Last but not least, my most important tip! Allow yourself a "To be filed" basket or tray that is easily accessible. This allows you to be "bad" every now and then for those times when you are in a rush of just don't feel like it. BUT leave yourself (or make yourself) go through this at least once a week to separate and file away whats in it. Otherwise, you'll have to start all over again!

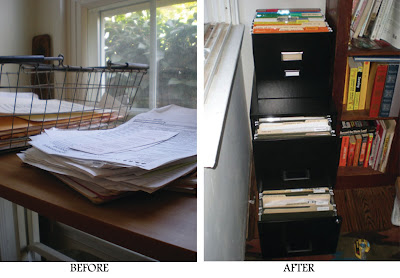
Whew! The hardest part is getting started and going through that scary pile. Once you do this, I hope that you'll find it's easier to keep up with than you think. Hopefully, like myself and my friend, you'll also find that its a bit addictive! Now that she has an organized home office (with pretty files!) she went on by herself to organize her husband's desk and their shared files! I'm so proud :)
Happy organizing!
Ellenor

No comments:
Post a Comment